Your computer’s performance relies on several components working together, but one of the most important pieces of the puzzle is your RAM (Random Access Memory). RAM helps your system run smoothly by temporarily storing the data it needs to access quickly. If your computer is slow, freezing, or crashing often, it could indicate that your RAM is no longer keeping up.
In this guide from TechGN, we’ll explain the key signs it’s time to upgrade your RAM, what RAM does, and how you can safely and efficiently install more memory yourself—even if you’re not a tech expert. Whether you’re using a desktop or laptop, this article will help you understand if a RAM upgrade solves your performance issues.
How Much RAM Do You Need?
This depends on how you use your computer:
- 4GB – Bare minimum, suitable only for basic tasks like email and web browsing
- 8GB – Standard for everyday use (office apps, streaming, light multitasking)
- 16GB – Ideal for gamers, creators, and multitaskers
- 32GB+ – Best for heavy video editing, 3D rendering, virtual machines, and developers
If you’re not sure how much RAM you have, here’s how to check:
On Windows:
- Press Ctrl + Shift + Esc to open Task Manager
- Go to the Performance tab and click Memory
On macOS:
- Click the Apple menu > About This Mac
Check the Memory section
Key Signs It’s Time to Upgrade Your RAM
If your computer is showing any of these symptoms, you’re likely running out of RAM:
1. Slow Performance and Lag
Your computer slows down when opening apps, switching tabs, or running multiple programs simultaneously.
Why does this happen? Your system runs out of usable RAM and starts using the much slower hard drive (called “paging” or “swapping”).
2. Freezing or Crashing
Apps randomly crash, or your system freezes during regular use.
Why does this happen? Processes fail or get stuck when your RAM can’t keep up, especially during memory-intensive tasks like gaming or editing.
3. Excessive Disk Usage
If your hard drive usage hits 100% constantly (even with a few apps running), it’s often due to RAM overflow.
Check it in Task Manager > Performance > Disk.
4. High RAM Usage at Idle
It’s a red flag when your computer uses a lot of memory even while idle.
Go to Task Manager > Performance > Memory and check the “in use” value.
5. Programs Load Slowly or Not at All
Apps like Photoshop, Excel, or Chrome take too long to load or display “Not Responding” messages.
This usually means you don’t have enough RAM for the application to run efficiently.
6. You Multitask Frequently
If you often have 10+ browser tabs open while editing documents, streaming music, or running virtual meetings, more RAM will help your system handle it.
7. Gaming or Video Editing Feels Choppy
Gaming frame drops, lag, or editing software that struggles to process video are clear signs that your RAM is maxed out.
Most modern games now recommend 16GB of RAM minimum.
How to Check RAM Usage
Before you upgrade, monitor your memory to be sure RAM is the issue.
On Windows:
- Open Task Manager
- Go to the Performance > Memory tab
- If usage is regularly above 80-90%, an upgrade will help
On macOS:
- Open Activity Monitor > Memory tab
Check Memory Pressure – If it’s always in the red, you’re running low
What to Know Before Upgrading RAM
1. Check Maximum RAM Supported
Look up your motherboard or laptop model online. You’ll find:
- How many RAM slots does it have
- Maximum supported capacity
- Compatible RAM types (e.g., DDR4, DDR5)
2. Match RAM Type and Speed
RAM sticks must match in type (DDR3, DDR4, DDR5) and ideally match in speed (e.g., 3200MHz).
Mixing RAM brands is okay, but keeping sizes and speeds the same prevents problems.
How to Upgrade RAM on a Desktop (Step-by-Step)
What You’ll Need:
- Compatible RAM sticks
- A screwdriver
- Anti-static wristband (recommended)
- A clean workspace
Steps:
- Shut down your PC and unplug it
- Open the case with a screwdriver
- Locate the RAM slots (usually near the CPU)
- Press down the latches to release existing RAM (if replacing)
- Align the new RAM’s notch with the slot and firmly press down until it clicks
- Close the case, reconnect everything, and power on
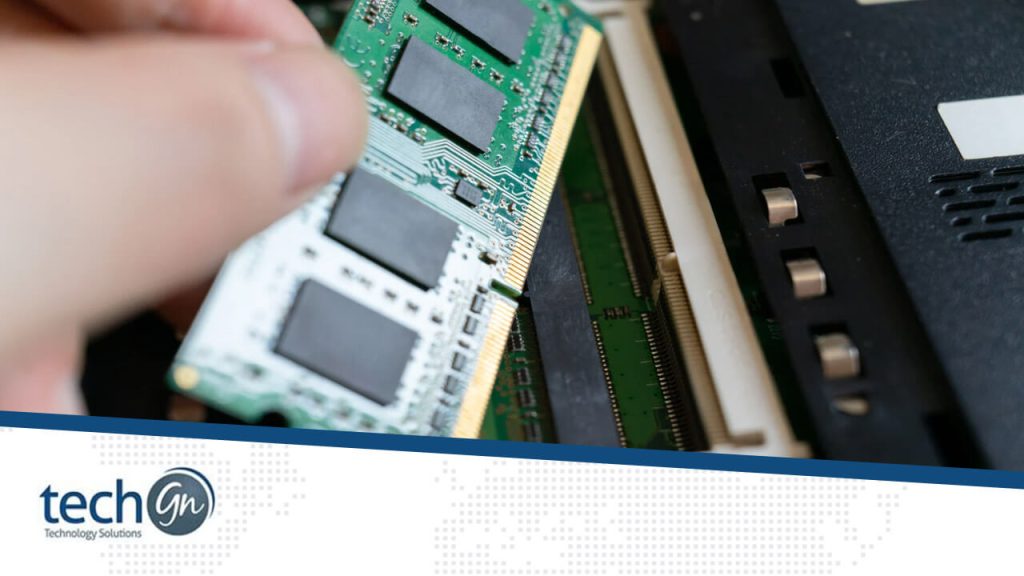
How to Upgrade RAM on a Laptop
Upgrading RAM in a laptop depends on the model—some have sealed cases or soldered RAM that can’t be upgraded.
Steps:
- Turn off the laptop and unplug it
- Remove the bottom panel screws (refer to your model’s manual)
- Locate the RAM slot(s)
- Gently push the metal clips apart to release the module
- Insert the new RAM at a slight angle, then press down until it clicks
- Reassemble the laptop and boot up
If your laptop has soldered RAM, you may be out of luck. Upgrading is only possible with an entirely new machine.
What Happens After You Upgrade RAM?
After installation:
- Boot into Windows or macOS
- Your system should automatically recognize the new RAM
You can verify the change via Task Manager or About This Mac
What to Expect After a RAM Upgrade
A proper RAM upgrade brings noticeable improvements, including:
- Faster boot times
- Smooth multitasking
- Less freezing and crashing
- Better performance in games and video editing
- More responsive apps and file transfers
Other Ways to Improve Speed (Besides RAM)
If you still experience slowness, consider:
- Upgrading to an SSD if you’re still using a hard drive
- Removing unused programs and background apps
- Scanning for malware
- Keeping your system and drivers updated
If your computer struggles to keep up with your tasks, it may be time to upgrade your RAM. Watching for the signs—like slow performance, crashing, or memory usage spikes—can help you stay ahead of hardware limits and avoid daily frustration.
At TechGN, we’re here to help you make smarter tech decisions. Whether you’re building a custom PC, optimizing your laptop, or simply trying to speed things up, we’ve got covered you with the tips, tools, and tutorials you need.
Need personalized help upgrading your RAM or improving your computer’s performance? Contact TechGN today.
Reviews
Tailoring Solutions